Showing posts with label home improvement. Show all posts

Monday, June 24, 2024

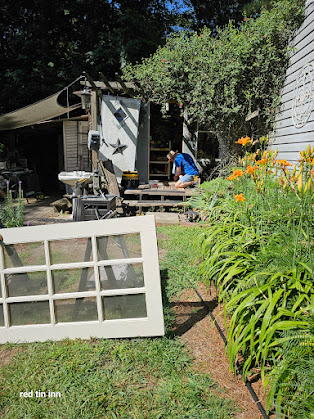
Woman Cave face lift Shop replacement door modified 15 pane French door


That door was an upcycle from the porch remodel. It is the original back door off the house.
and is over 30 years old.  It is also ugly!  

We found a 15 pane single french door at one of our favorite second hand stores, Hidden Treasures in Elgin SC.  It was the right price so we snagged it.


It was the correct width but a little tall.  
so we cut it down to fit the She Shed. 


Fortunately when we pulled the old door off we saw a few deck boards that needed to be replaced.


Mr. RTI is an amazing builder but window repair not so much.  Red Green would be so proud!  He could be an honorary member of the Possum Lodge with that duct tape application. Luckily he is the one that broke the window and gladly went the extra mile to replace it.


The windows in the shop are also from a home remodel  .  We decided to take the bottom window out of the opposite window, hidden by the Red Honey suckle , and install it to the left of the door.  The most light comes through that window.  And drop in some exterior wall board in place of the window.  

This was also the perfect opportunity to refresh with some exterior weather beater white paint.


I think I will leave the door the off color.  It will match the same theme at the Green house. 


 I mean who wants to paint around all of those windows!  

If you live in the area check out Hidden Treasures in Elgin on Main Street and a second location on Green Hill road in Elgin.

Happy Thrifting!

Sheryl


Monday, June 12, 2023

Composite Decking or faux wood decking upgrade


There have been a lot of changes  since we moved in almost 30 years ago.  The latest is composite decking to replace the warping splitting existing deck.  The last wood deck was put on about 5 years ago and had already starting to rot and needed cleaning every season.  


We are not getting any younger so we bit the bullet and purchased the materials to replace 65 feet x 10 feet of decking.  CHA-CHING 16 dollars each for 8 foot and 24 dollars for 12 foot boards and the two 5 lb boxes of screws cost 38 dollars ea. This did not include the boards we needed for a few joist repairs.  


Yes Daddy I fixed that Flag.


I think it was well worth the investment and in 5 or 10 years hopefully it will still look this good!
You have a blessed day!
Sheryl


Saturday, February 27, 2021

Complete Master Bathroom Remodel DIY walls floors vanity and soaker tub


I am about to let my 38 readers see a part of my house that is quiet embarrassing.  The old master bathroom and all of it's neglect.  There are many reasons that we put this remodel off and the first one being MONEY the second one being TIME.  

We have basically remodeled every room in this house except the master bathroom.  We have just made changes to it.  It is a busy room it shares space with a washer , dryer and the ugliest window in the world.


The original bathroom had two vanities with angle wall and built in make up bar between them.  We pulled the make up bar out first and substituted storage with a wire rack. (for way too long)

Bad Photo but you get the idea!


We removed the right vanity to expose the plumbing lines then on to the angled wall.
Hubby began pulling the angled wall out and rerouting the electric lines.  If you do not have experience with electric lines call an electrician!  Mr. RTI has experience in basic electrical work and felt confident in completing this portion of the remodel.


While we had all the electric exposed we decided to add some ceiling lights.  These are the "pop" in lights that do not need to have a rafter to mount to.  We added two, one with a dimer and one wired in to the light switch  placed over the washer.

We wanted shiplap so cover the walls and to save money we used  4 x 8 foot multi purpose panels cut in 6 inch wide planks.  We cut them ourselves.


We painted them white and learned quickly that caulk is KING.  This saved us $400.00 compared to buying primed shiplap kits. 

We purchased a vanity with marble top and sink from Wayfair.


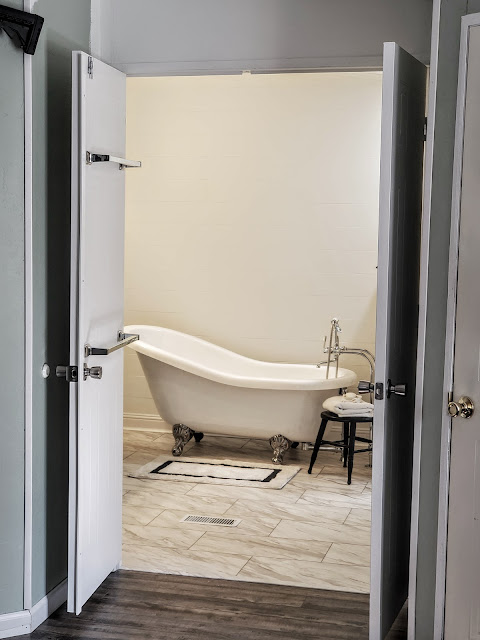
We ordered the tub from Home Depot. (Mr. RTI's idea)  The tub came with the floor mounted filler and drain.  


It sat in the bathroom un plumbed for months.  It also got carried back and forth from the master bedroom a few times.  Good thing it is acrylic!

We choose a LVT water proof flooring.


It installed over the existing floor and transitions beautifully from the bedroom flooring.


This is the longest home improvement project EVER!  We still have not finished.  The old skylight on the interior has to be filled in and the ceiling painted.  
However here is where we are:


So enjoying this room!  Clean and functional!
What we learned:
Measure your space to make sure your large purchases will fit.  
Hold out for the best quality that you can afford especially if this is the last remodel.
Take you time.
Buy reasonably priced proper tools to complete the project it pays off in the end.
You do not have to purchase everything at one time unless you have the funds.  We had been buying and storing supplies for a while.

No matter what your next project is
I hope this post finds you well and Happy!
Sheryl


Monday, November 9, 2020

LVP, Luxury Vinyl plank flooring, Smartcore Floor install, Is the Cost Worth it? mobile home diy upgrade


Is the cost worth it?   I will have to say yes.  The blue peel and stick that was 10 years past its life cycle was coming up and chipping.  A wheel chair , dogs and shoes are not easy on flooring and it showed.  It served its purpose it was affordable when there was not a budget for it.


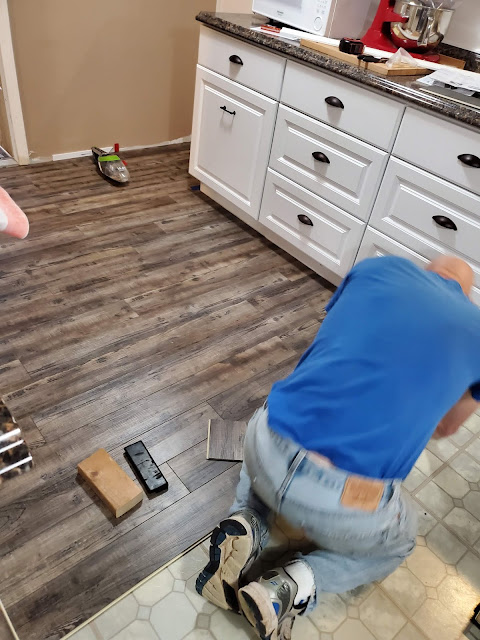
We choose Smartcore in Shady pine.  It is available at Lowes and you will most likely have to order it, it seems to be popular.  We covered about 1600 sq. feet. (I will pause while you do the math) The flooring is water proof and if you get a scratch in it you just buff it out with a magic eraser.  Mr. RTI suggest that you get a good flooring tool set that fits the profile of your floor. Use the wall spacers. A good rubber mallet and knee pads will save your knees and time.  Go in the same direction (as recommended by the instructions) and stagger your joints.  Make sure that you rest the block above the grove not in it or you will break the edge.  You tube Videos were most helpful!  

Correct

incorrect


It took a little time and in between stages we taped the floor edges with painters tape and run scrap pieces along the edge not to break it.


I did not think we were ever going to get it finished!
MR RTI does amazing work.  He laid every piece of this flooring!


IT was worth every penny!  A major investment in our home and one that when installed correctly will last for a long time.  To clean this floor I use a gentle cleaner and warm water or a little vinegar with a small quirt of dawn in the spin mop bucket.  It is recommended to not use a steam cleaner on it and I will assume heat will warp the vinyl.  It is easy to keep clean and water proof (we have tested it).   We did a good bit of research and read a lot of reviews before making this purchase and I recommend, if you are thinking of taking the plunge, to also do your research.  It was a huge part of our on going renovation and one that has hit the budget pretty hard but in the long run a great investment.

God Bless,
Sheryl