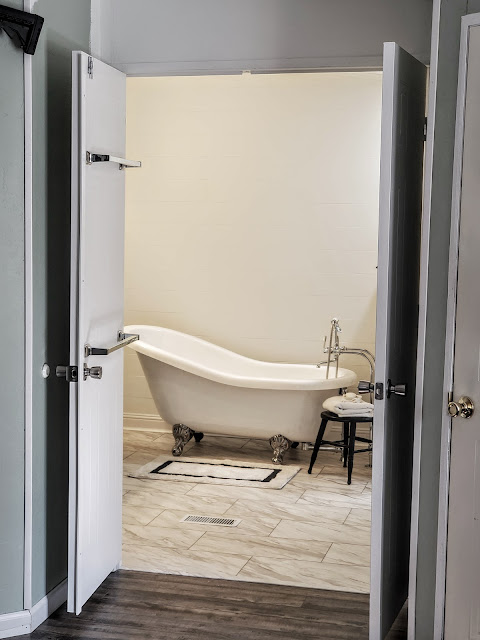
I am about to let my 38 readers see a part of my house that is quiet embarrassing. The old master bathroom and all of it's neglect. There are many reasons that we put this remodel off and the first one being MONEY the second one being TIME.
We have basically remodeled every room in this house except the master bathroom. We have just made changes to it. It is a busy room it shares space with a washer , dryer and the ugliest window in the world.
The original bathroom had two vanities with angle wall and built in make up bar between them. We pulled the make up bar out first and substituted storage with a wire rack. (for way too long)
Bad Photo but you get the idea!
We removed the right vanity to expose the plumbing lines then on to the angled wall.
Hubby began pulling the angled wall out and rerouting the electric lines. If you do not have experience with electric lines call an electrician! Mr. RTI has experience in basic electrical work and felt confident in completing this portion of the remodel.
While we had all the electric exposed we decided to add some ceiling lights. These are the "pop" in lights that do not need to have a rafter to mount to. We added two, one with a dimer and one wired in to the light switch placed over the washer.
We wanted shiplap so cover the walls and to save money we used 4 x 8 foot multi purpose panels cut in 6 inch wide planks. We cut them ourselves.
We painted them white and learned quickly that caulk is KING. This saved us $400.00 compared to buying primed shiplap kits.
We purchased a vanity with marble top and sink from Wayfair.
We ordered the tub from Home Depot. (Mr. RTI's idea) The tub came with the floor mounted filler and drain.
It sat in the bathroom un plumbed for months. It also got carried back and forth from the master bedroom a few times. Good thing it is acrylic!
We choose a LVT water proof flooring.
It installed over the existing floor and transitions beautifully from the bedroom flooring.
This is the longest home improvement project EVER! We still have not finished. The old skylight on the interior has to be filled in and the ceiling painted.
However here is where we are:
So enjoying this room! Clean and functional!
What we learned:
Measure your space to make sure your large purchases will fit.
Hold out for the best quality that you can afford especially if this is the last remodel.
Take you time.
Buy reasonably priced proper tools to complete the project it pays off in the end.
You do not have to purchase everything at one time unless you have the funds. We had been buying and storing supplies for a while.
No matter what your next project is
I hope this post finds you well and Happy!
Sheryl


No comments:
Post a Comment