Showing posts with label mobile home kitchen remodel. Show all posts

Monday, November 9, 2020

LVP, Luxury Vinyl plank flooring, Smartcore Floor install, Is the Cost Worth it? mobile home diy upgrade


Is the cost worth it?   I will have to say yes.  The blue peel and stick that was 10 years past its life cycle was coming up and chipping.  A wheel chair , dogs and shoes are not easy on flooring and it showed.  It served its purpose it was affordable when there was not a budget for it.


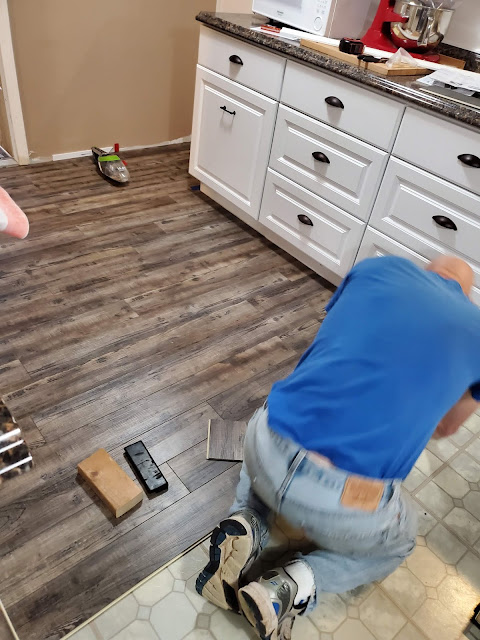
We choose Smartcore in Shady pine.  It is available at Lowes and you will most likely have to order it, it seems to be popular.  We covered about 1600 sq. feet. (I will pause while you do the math) The flooring is water proof and if you get a scratch in it you just buff it out with a magic eraser.  Mr. RTI suggest that you get a good flooring tool set that fits the profile of your floor. Use the wall spacers. A good rubber mallet and knee pads will save your knees and time.  Go in the same direction (as recommended by the instructions) and stagger your joints.  Make sure that you rest the block above the grove not in it or you will break the edge.  You tube Videos were most helpful!  

Correct

incorrect


It took a little time and in between stages we taped the floor edges with painters tape and run scrap pieces along the edge not to break it.


I did not think we were ever going to get it finished!
MR RTI does amazing work.  He laid every piece of this flooring!


IT was worth every penny!  A major investment in our home and one that when installed correctly will last for a long time.  To clean this floor I use a gentle cleaner and warm water or a little vinegar with a small quirt of dawn in the spin mop bucket.  It is recommended to not use a steam cleaner on it and I will assume heat will warp the vinyl.  It is easy to keep clean and water proof (we have tested it).   We did a good bit of research and read a lot of reviews before making this purchase and I recommend, if you are thinking of taking the plunge, to also do your research.  It was a huge part of our on going renovation and one that has hit the budget pretty hard but in the long run a great investment.

God Bless,
Sheryl


Sunday, July 12, 2015

Kitchen clock up cycle time for your meds!.. Kitchen cabinet alternative


Recently we upgraded a portion of our kitchen you can read about it HERE.  An unexpected part of this update was a clock wine bar that was up cycled in to a Medicine/what ever cabinet.

We were on our way back to the store to look for a replacement idea for the medicine cabinet/whatever.  We were using a prefab double door pantry cabinet and wanted to add something new in the mist of the excitement of our remodel.  We passed a yard sale and had to stop.  There  was a  large clock wine bar ...roughly 7 feet tall...that was a steal at 5.00 bucks..yep...5.00.  It was that cheap because the backer board was busted..not a problem .  It was a yellow off white yucky color..not a problem ....First things first..address the color..now when I am painting a piece of furniture for my own home...I am not that worried about the inside especially if the door will be closed.  I mixed a few colors of chalk paint I had to get this french blue...Made sure I mixed enough to complete and touch up .  I do not normally write formulas when mixing paint.  


This is a neat item.  the cock will come out of the top if you  just want a clear door and the clock works.  It has some really nice detailed legs....

And is heavy!  This is all wood except the backer board...I did not get a photo of the back however I will let you know how I addressed it.  Since this was going in a corner against a wall I did not finish the out side of the back.  I taped the busted areas front and back getting them as even and smooth as possible.  Then glued on Paint able wall paper on the inside - side.  The wall paper made for a sturdy covering and was white I did not paint it.  No one is the wiser well except for you....(WINK)


I was a little shocked when we sat it in ...was not expecting it to be so large!  or wide.  However it grows on you and really holds allot.  I left the pull out tray and drawer as well as stem ware rack in it.  It hold all medications and plastic wrap and bags..nice space freed up in the pantry.  The top Behind the clock is the distilled water I used for Humming bird feed...with some room to spare.


Underneath we kick off our shoes at the back door.  


I finished the out side with Johnson's paste wax.  Yes..I hand sanded, waxed and buffed this item.  It was a lot of work and calories however it feels wonderful.  Hint on paste wax...there is never too little...the less you smear on the easier it is to buff back out.  I use a wax brush that you can find at Joann's by Folk art ..take your coupon.. paper, text or off their app on your phone. (they will accept more then one coupon if from a different source..IE you can use all three on three items at one time) My large brush cost me around  9.00 bucks and I like it.  If you are currently using a high end brush I am sure you will find fault.  However if you just want a brush to get the job done and clean up easy (with dawn) this is a economical alternative to a 50.00 brush that you will pay shipping on.


I sprayed small knobs with rubbed oil bronze paint to match the counter tops and pulls...

I think the clock added some whimsy to the kitchen as well as utility.  


I am glad that you stopped by.  I hope that you have been inspired to see furniture in a new light!  I with a little creativity and elbow grease it can be perfect for ya!
Sheryl


Sharing with:

http://sillypearl.com/2015/07/project-inspired-link-party-week-128.html

Sunday, July 5, 2015

The kitchen facelift has begun! Phase 3 remodeling a Mobile Home Kitchen

We are still on a remodel Journey...and have made some drastic changes here.  You can see the transformation HERE.  But..today's post is to share with you a partial remodel of the Kitchen.  

What a mess...and it has been this way well for about 15 years.  there was a large useless built in pantry and a breakfast nook .  With a growing wheel chair in the house the nook was just wasted space...


.. not very efficient..I prepped food on a 24 x 22 inch space for years....
Also there were large windows to deal with. 


This was a two part ordeal.  First we addressed the windows.  Luckily when we added the porch (you can read about it here)  we saved the vinyl siding.  One less purchase.  Handy Hubby pulled the large windows out and replaced them with efficient slide sliders....and the change was shocking!  Wow !

Insulation added.


However your could really tell a difference in the efficiency!  The temps were reaching above a 100 degrees under that pergola....and the windows were cool.  These will pay us back...and only 10 more windows to go...to complete the house.

The saved vinyl worked beautifully...


I think HH out did himself yet again....a nice Job.


It was a exciting day when these arrived!


We selected the Hampton Bay brand of prefab cabinets... It took 5 we needed to make a 10 foot run, leaving roughly two feet on the end for a cabinet.    The three with two 8.5 inch deep drawers and a utensil top drawer we had to order .  The two stock cabinets with single drawer with cabinet bottoms we picked up at the store.  

Demo has started!


The small cabinet came out and the modge podge was moved or rolled somewhere else temporarily


We decided to put the cabinet doors on each end and line the drawer units up in the middle..they were leveled and attached to the walls....

We were off to Home Depot to pick up the counter top.  While in the store HH noticed that the lip on the counter top was low enough to to prevent the drawers from opening.  We chose a Hampton Bay counter top and assumed that it would just drop on top.  Also if you look closely there are no brackets in the corners that you would use to attach your counter top.  Can you Believe that the Home Depot Associate had no idea where you could get those!  I am Shocked NOT !
The Solution was to use 1 x 3 inch boards to shim the top and attach to the cabinets.  They lifted the the counter top enough to make sure the drawers would open.

With the counter top on we were ready to install the cup pulls.  I choose a rubbed oil bronze in a simple design.  There were 9 cup pulls and two door pulls.  A lot of drilling....


To make the Job easier HH made a jig that would sit on the corner of the drawer and you could mark where you needed to drill the holes.  


It worked like a charm made the installation a lot quicker. 


We installed bead board on the wall and eventually will make our way around. HH installed a led light bar over the prep area ..Very Nice!
The kick board or base board is in the shop waiting to get a coat of paint.  But until then....I am loving the extra space.  The clock works..and is actually a wine bar.  We use it for unique storage ....I will post on the upgrade on this Yard sale find in a later post.  This was not a top of the line upgrade.  Everything we used was a stock item or prefab.  It is very "doable" !  
Glad that you came by I am off ..Those tomatoes will not put themselves up!  
Sheryl

Sharing with....


Tuesday, December 9, 2014

Coffee Bar on a budget open shelving concept in Mobil home Kitchen


I did not edit or change anything when I took this photo this morning of an addition that Mr. RTI and I  made this summer.  This wall has been a modge podge of furniture and racks.  We decided that we wanted a dedicated area for coffee and tea as well as snacks and some much needed storage.

As you already know when you walk into the hardware or home improvement store prices are astronomical when it comes to cabinets.  Fortunately we are on a bit of a budget so we had to think out side of the "box" and I love the design we came up with.  

We started by building a pine base to fit the dimensions we needed....We did have to scribe the back of the shelves to fit a not so straight or flat wall....WARNING SMART PHONE PHOTO!


We also used the same pine as the back "splash" and added a kick board so that doggy bunnies cannot hide underneath.  The two shelves are higher grade plywood...and the top is from the shelving isle it is

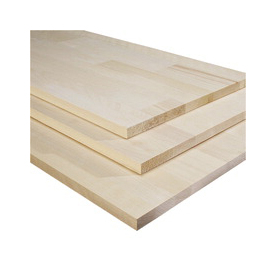
Clear Kiln-Dried Aspen Panel 


 Clear Kiln-Dried Aspen Panel (Common: 3/4 x 24-in x 72-in; Actual: 0.75-in x 24-in x 72-in)

After a light sanding to smooth it out....I stained it with Cabot Cove aged leather stain with poly...I applied three coats letting it dry over night.  Then I applied paste wax to add another water prof. coat on top.  It looks and feels like reclaimed lumber with out the work or the high cost.

The bottom shelves were actually stained with White floor deck stain.  And are holding up nicely.  The trim I used standard house trim paint in white.  
ANOTHER SMART PHONE PIC!


The top shelves are actually melamine coated garage utility shelving.  It is durable already white and cleans up like a breeze.  I used the same shelving when I removed my upper cabinets above my stove... a few years back and I am very impressed with its durability.


This area is very busy all day.  There are up to five people here on a daily basis that drink coffee or tea more than once a day.  My kitchen is  Grand Central at our home, as you can see from the mess on the table, and this made a very economical and efficient addition..
Now to talk Mr RTI into doing the rest of the kitchen........I will try to keep you posted!
Much love all Season!
Sheryl