Showing posts with label chalk painting fabric. Show all posts

Friday, June 9, 2023

The Power of paint on furniture and fabric and décor.

A quick recap of my favorite transformations using paint:


Metal Military cabinet 

Using Krylon spray paint.


Small Bench


Little bench using Annie Sloan Emperors silk and dark wax.


China Cabinet


Using Country Chic chalk paint and clear wax.


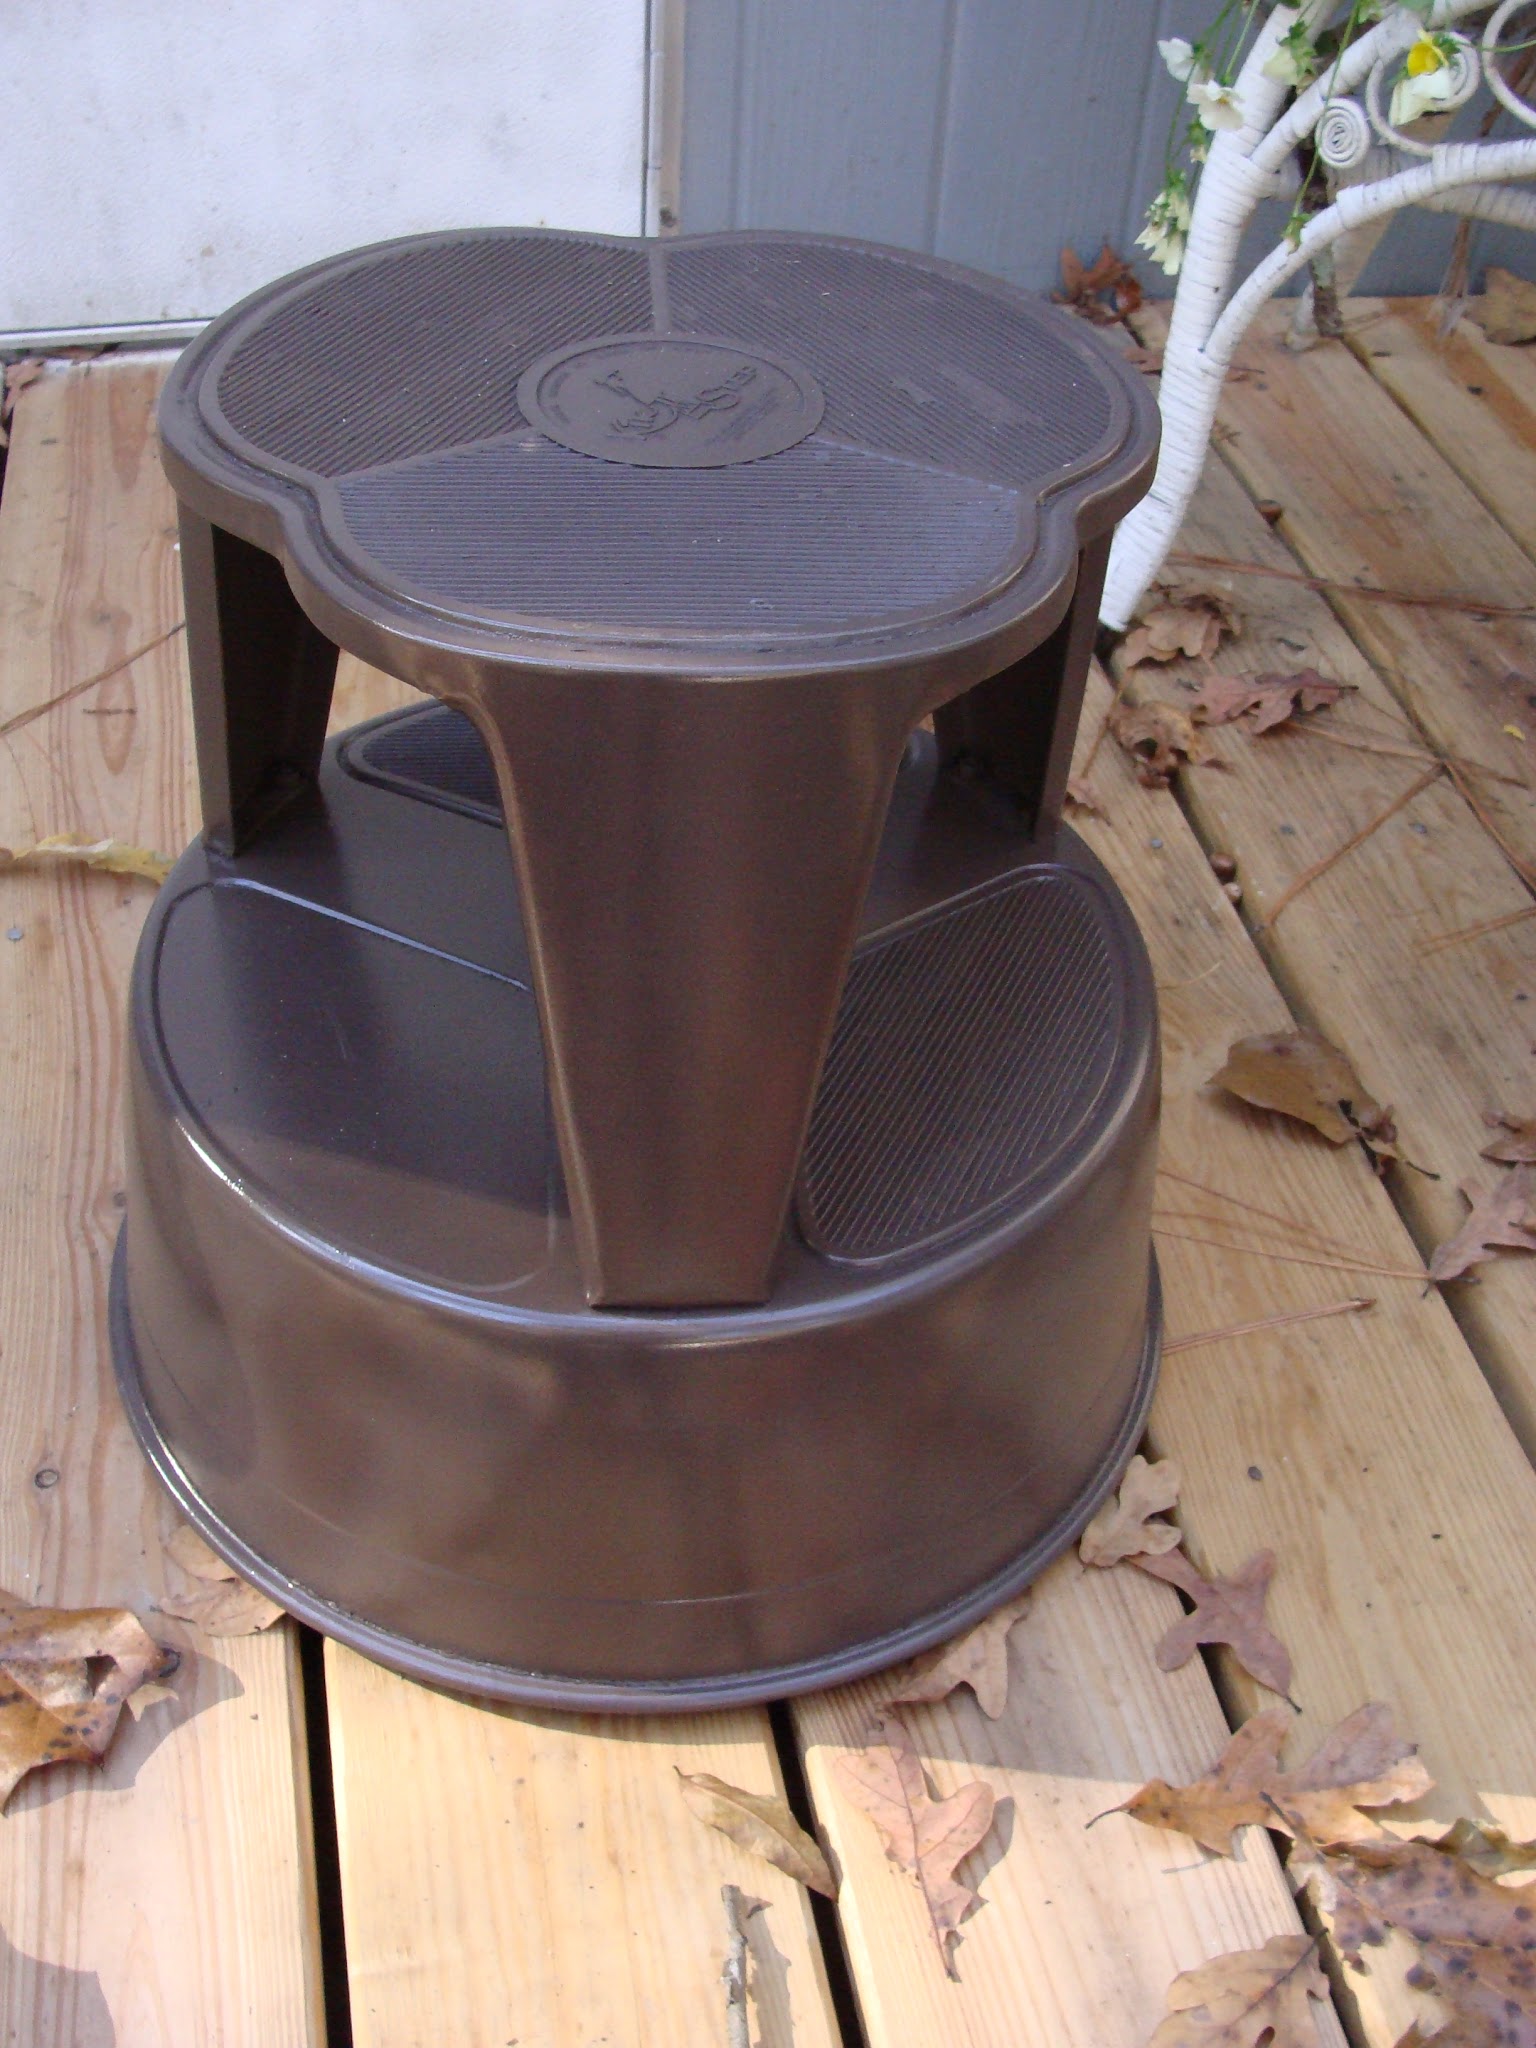
Kick step Stool


Using Rust-oleum Oil rubbed bronze.


Kitchen stool


Using Rust-oleum Oil Rubbed Bronze


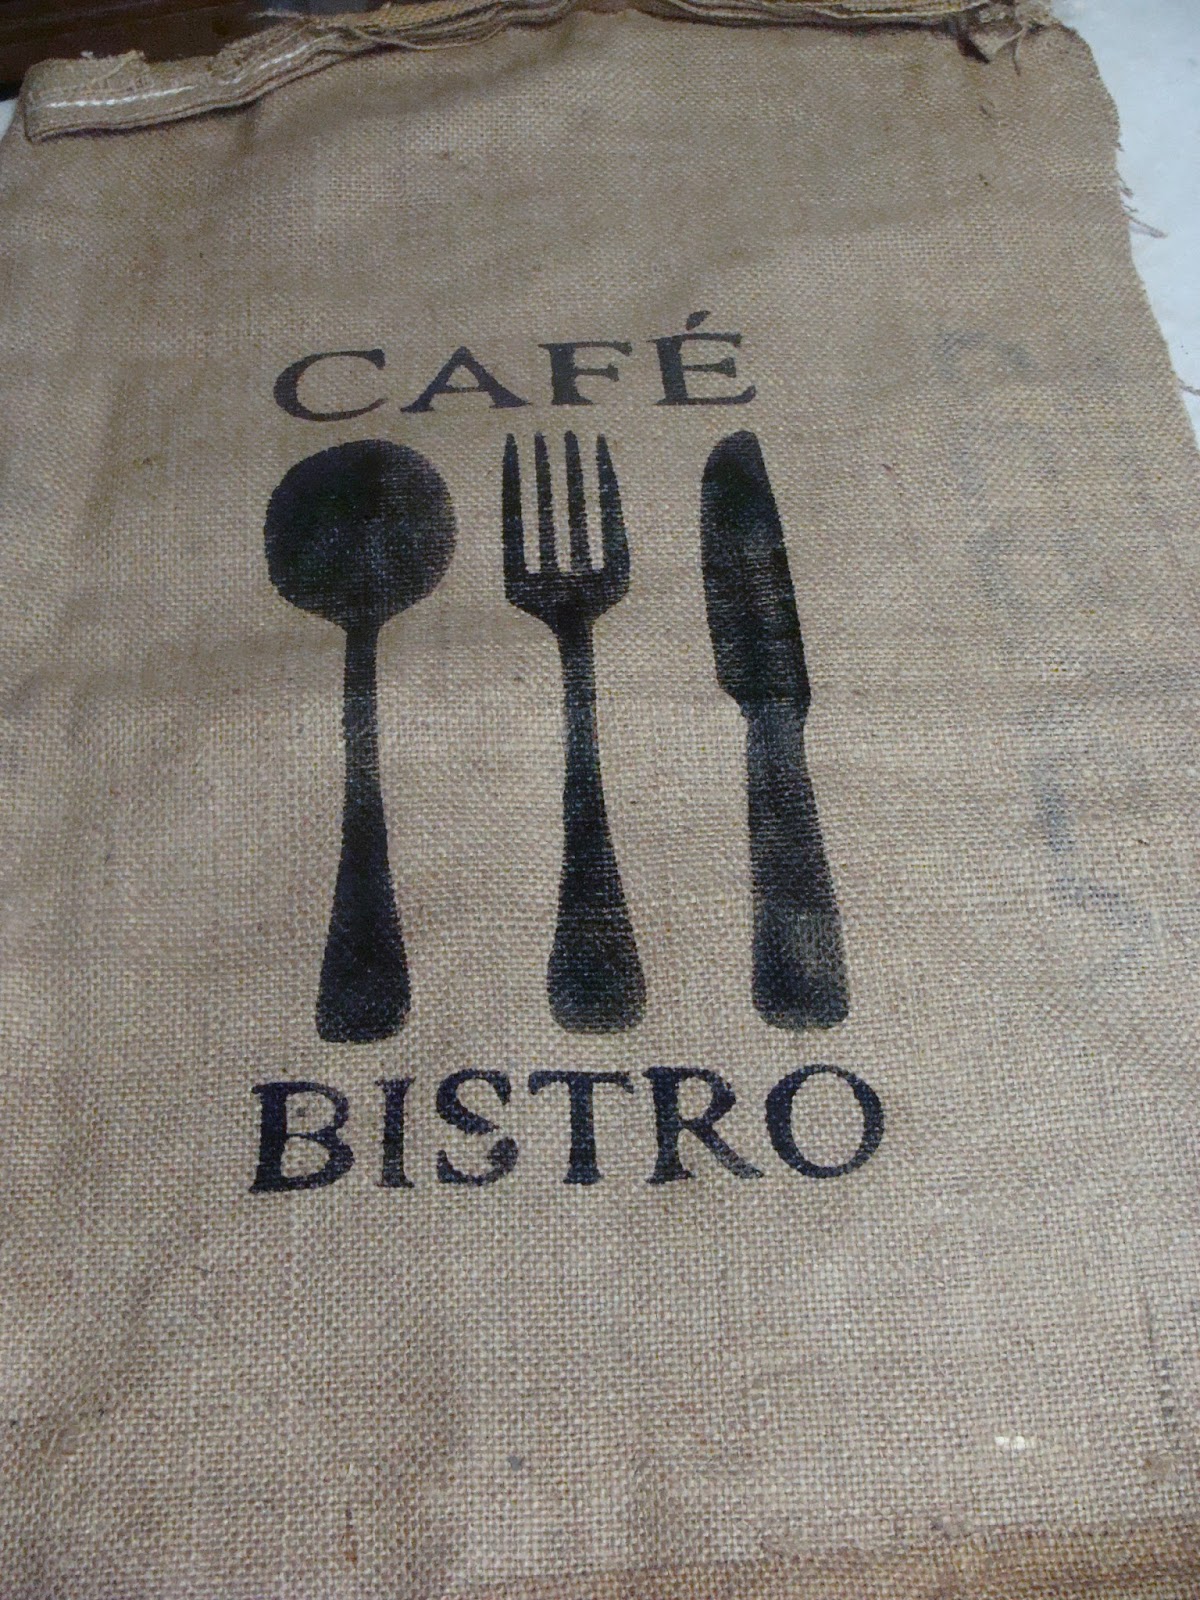
Burlap wall art
Using Silhouette cameo cutter with butcher paper and Annie Sloan Graphite chalk paint.  Applied to burlap.


Wooden small cabinet


Country Chic paint with clear wax and decoupage .


Metal Cabinet


Annie Sloan Paris Grey with clear wax.


Homemade pillow covers

Using Silhouette cameo cutter with butcher paper and Annie Sloan Graphite chalk paint.  Applied to dropcloth.


Cutlery organizer


Using Annie Sloan Graphite chalk paint and antique white


French Style Settee.  Fabric and frame painted with Annie Sloan Old White chalk paint with Annie Sloan white wax.  Finished like leather. 


Small Dresser painted with Country chic paint and clear wax.


Small Buffet painted with a custom mix of Country chic chalk paint and clear and dark combo. wax.


Chest of Drawers


Custom mix of Annie Sloan old white and COCO with clear wax original hardware left aged.


Ladies writing desk.


Country Chic chalk paint with clear wax.


Old large Barn Screen


Sealed with Rust-oleum matte clear and stenciled with Annie Sloan old white.


The power of paint to transform on many surfaces!  Hope you have been motivated to create !!

Sheryl


Saturday, June 28, 2014

Drop cloth pillow cover Intro to using The Silhouette Cameo and freezer paper


I love a good re purpose. I have also fallen in love with laundered drop cloth. The imperfections add interest as well as a vintage feel.  I really like the cheaper brand that Walmart carries it washes super soft. This was actually the first cloth that I stenciled using the freezer  paper method.  
You can read about it and the Silhouette here

The pillow cover is removable and washable.  
A simple envelope back using the original hemmed edge of the drop cloth as my top.
I put right sides together taking in to consideration of overlapping your two back pieces and stitched the cover 1.5 inches larger than I needed it.  I turned it pressed and stitched 1.5 inches from the edge and slipped the pillow form in.


Very simple and I think it looks pretty good in this ASCP painted chair.  

So glad that you stopped by,
sheryl

Sharing at:


Tuesday, April 29, 2014

How To: Stenciling Burlap with chalk paint , freezer paper and Silhouette Cameo

If you have been following my post lately you know that I have managed to get a stash of burlap.  You can read about the pillow project here.  Or the coffee burlap art here.
The main tools in this project are: Silhouette, computer, freezer paper, Iron, Glue gun, old canvas , Black paint or color of your choice, sharp scissors, ribbon or trim and blank burlap.

Choose a design for your signs , measure to make sure they fall on your canvas where you want.  These were 8x10 inches so my design was roughly 6 x 8 inches.  You can use the grid in the Silhouette software and if you are using a Cricut it has the same feature with their online program.  Note to Cricut users if you have not set up your cricut on line software account you may want to.  If will make projects like this so much easier.   If you decide to use a printer you can set your page size to 8x14 and get the dimensions you need.  cut your freezer paper to 8.5 x 14 to feed into the printer.  Note make sure you print on the non shiny side of the freezer paper.  This way your image will not smear because the wax will not soak up the ink and your image will not be backwards.  Cut your images out of your paper using craft knife or scissors.
Once you have your design cut out iron it onto your burlap.  The more texture your burlap has the longer you need to take to press.  I used a little 1950's GE travel iron for this Job and it was set on the lowest cotton setting no steam. 

 Iron slowly giving the wax time to adhere to the textured burlap.  Once you see that the wax paper is adhered with out gaps on the edges you are ready to stencil.  I used what ever black I had since this was hanging on the wall and not going to be washed or worn.  Note that you will need to load your stencil brush heavier than normal to get good color .  I started in the center of my cut out area and worked my way to the edges.  


When the paint dries and is no longer tacky peel off the paper. Note if you peel the paper while it is wet you risk smudging paint where you do not want it. I did not press or heat set this because it is going to hang on the wall.  
Mounting the burlap to the re cycled canvas is a tricky step simply because the burlap will stretch.  I used clamps to hold it in place after I centered it.


Glue one edge top or bottom does not matter...then glue the opposite edge pulling slightly taught.  Make sure to check the front to make sure you are not getting the design out
 of whack.  Then go side to side checking regularly.
In order to cut the bulk out of the corner I cut a flap on the top and pulled it taught and glued it to the side.


 I then mitered the corners in the back.  
I trimmed the fabric on the edges and applied ribbon to cover the raw edges.

All finished..

I hope this has inspired you!  
Sheryl

Sharing at: