Showing posts with label kitchen herbs. Show all posts

Friday, July 15, 2022

Drying Herbs for Kitchen Use. How to dry herbs


Herb growing and drying is an easy kitchen "preserving" task .  Herbs do not require a lot of care and three of the Five herbs that I dried today are perennial and return every year.  Oregano, Sage and Rosemary return every year.  Rosemary and Oregano are  evergreen in growing Zone 8 a .   I normally can find these in my garden year round.  Sage will semi die back sometimes offering a  sparse leaf every now and then in the winter months.   Basil and stevia I replant every year.  Basil is very easy to grow.  You will need a sunny spot with soft soil.  I cast seed every year in a pot or corner of the garden bed and water regularly until I have a healthy plant then just water weekly .  Stevia I pick up at local nursery or Lowes.  It is a fast growing plant that pinching it back increases its growth.

The first task is to collect your leaves .  Select blemish free leaves that look healthy.  Wash them well and drain as much of the water off that you can.  I place my herbs on a old towel and pat them gently dry.  Drying the leaves will make the drying process go a lot faster.  


I use a dehydrator to dry my herbs.  It is quick and neat.  You can use your stove and microwave as well.  Google offers may ideas on this process if you do not have a dehydrator.  
Once I have my leaves washed and patted dry I arrange them on a dehydrator tray .  Try not to mix your leaves unless you are making a mix.  


I took about 4 hours to dry completely. I checked  the trays about every hour rearranging leaves that were stacked .  
I store my herbs in jars with air tight lids.
There is a huge difference in the taste and smell of leaves that have been dried at home verses bought off the shelves.  The cost is minimal, and to be honest gathering, washing and drying are all therapeutic.  Hope you dry a few herbs yourself the winter soups and stews will be tastier.   
Happy Summer!
Sheryl  


Sunday, July 5, 2015

The kitchen facelift has begun! Phase 3 remodeling a Mobile Home Kitchen

We are still on a remodel Journey...and have made some drastic changes here.  You can see the transformation HERE.  But..today's post is to share with you a partial remodel of the Kitchen.  

What a mess...and it has been this way well for about 15 years.  there was a large useless built in pantry and a breakfast nook .  With a growing wheel chair in the house the nook was just wasted space...


.. not very efficient..I prepped food on a 24 x 22 inch space for years....
Also there were large windows to deal with. 


This was a two part ordeal.  First we addressed the windows.  Luckily when we added the porch (you can read about it here)  we saved the vinyl siding.  One less purchase.  Handy Hubby pulled the large windows out and replaced them with efficient slide sliders....and the change was shocking!  Wow !

Insulation added.


However your could really tell a difference in the efficiency!  The temps were reaching above a 100 degrees under that pergola....and the windows were cool.  These will pay us back...and only 10 more windows to go...to complete the house.

The saved vinyl worked beautifully...


I think HH out did himself yet again....a nice Job.


It was a exciting day when these arrived!


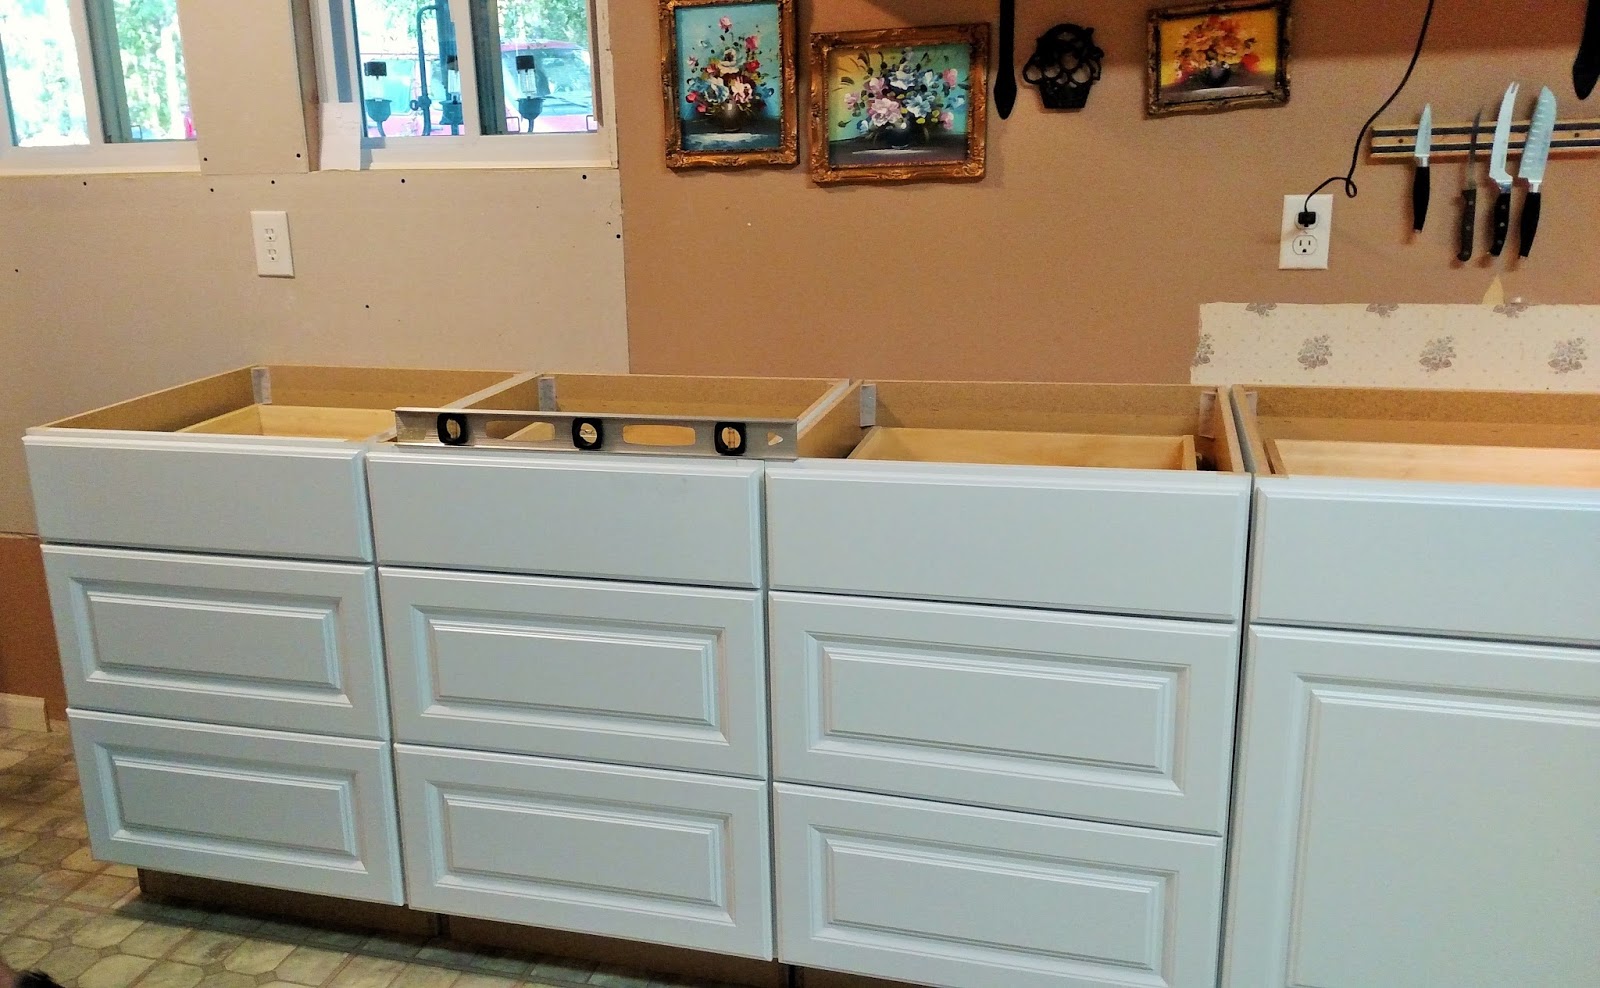
We selected the Hampton Bay brand of prefab cabinets... It took 5 we needed to make a 10 foot run, leaving roughly two feet on the end for a cabinet.    The three with two 8.5 inch deep drawers and a utensil top drawer we had to order .  The two stock cabinets with single drawer with cabinet bottoms we picked up at the store.  

Demo has started!


The small cabinet came out and the modge podge was moved or rolled somewhere else temporarily


We decided to put the cabinet doors on each end and line the drawer units up in the middle..they were leveled and attached to the walls....

We were off to Home Depot to pick up the counter top.  While in the store HH noticed that the lip on the counter top was low enough to to prevent the drawers from opening.  We chose a Hampton Bay counter top and assumed that it would just drop on top.  Also if you look closely there are no brackets in the corners that you would use to attach your counter top.  Can you Believe that the Home Depot Associate had no idea where you could get those!  I am Shocked NOT !
The Solution was to use 1 x 3 inch boards to shim the top and attach to the cabinets.  They lifted the the counter top enough to make sure the drawers would open.

With the counter top on we were ready to install the cup pulls.  I choose a rubbed oil bronze in a simple design.  There were 9 cup pulls and two door pulls.  A lot of drilling....


To make the Job easier HH made a jig that would sit on the corner of the drawer and you could mark where you needed to drill the holes.  


It worked like a charm made the installation a lot quicker. 


We installed bead board on the wall and eventually will make our way around. HH installed a led light bar over the prep area ..Very Nice!
The kick board or base board is in the shop waiting to get a coat of paint.  But until then....I am loving the extra space.  The clock works..and is actually a wine bar.  We use it for unique storage ....I will post on the upgrade on this Yard sale find in a later post.  This was not a top of the line upgrade.  Everything we used was a stock item or prefab.  It is very "doable" !  
Glad that you came by I am off ..Those tomatoes will not put themselves up!  
Sheryl

Sharing with....